Connection of Welotec IoT Edge Devices to inray OPC Router
In this step-by-step guide, you will learn how to install the OPC Router from inray on Welotec IoT Edge Devices. The use of edge computing gateways offers both cost and time advantages and enables Docker containers to be deployed on the OPC Router. The preparatory steps include setting up and linking the Azure IoT Hub, creating the device provisioning service and linking the IoT Edge Devices with Azure.
1. Connection
1.1 Connection to the Welotec IoT Edge Device via SSH
To be able to use the unit, establish a connection via SSH. We recommend the programme “PuTTY” for this. Then enter the IP address and the port in the corresponding window.
- Host Name (or IP address): IP address of the Edge Device (192.168.2.1 by default).
- Port: Port via which the Edge Device is addressed. (by default, port 22 for SSH access).
- Connection type: Select SSH here.

If the connection was successful, enter the login data in the newly opened window.
The default login data is as follows:
User: admin
Password: 123456
After the first connection, the password must be changed.
2. Azure IoT Hub
2.1 Create a resource
To set up an Azure IoT Hub, an Azure Subscription is required. Then log in to the Azure Portal via https://portal.azure.com. Then select “Create resource”.
![]()
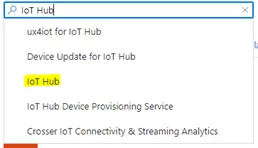
Entering in the search will take you to the IoT Hub.
Clicking on “Create” opens the configuration for the IoT Hub.
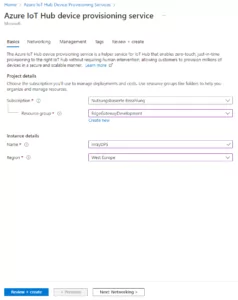
2.1.1 Basic settings
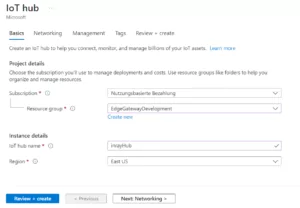
Make the basic settings here. To do this, select the corresponding subscription and a resource group. If none exists yet, you can create one. To do this, click on “Create new item”. Then enter a name for the IoT Hub. Finally, select the region.
2.1.2 Network
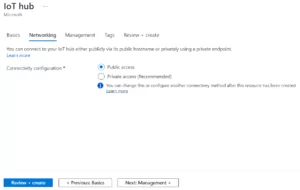
Once you have made the basic settings, click on the “Network” tab.
The access option is set in this item. Select “Public access” here. If you select “Private access”, a virtual network must be set up beforehand.
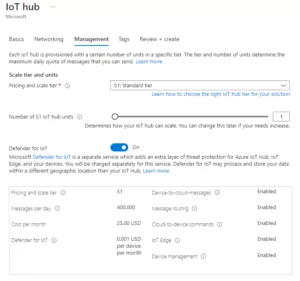
2.1.3 Management
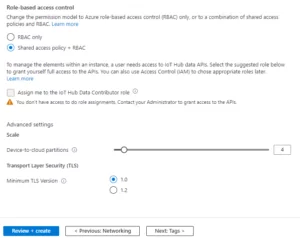
After adjusting the network, click on the “Administration” tab. Here the tariff options and access control are selected.
Select a tariff that you think is suitable. Please note that the tariff includes the activation for IoT Edge Device, which is necessary. It is also recommended to use the “Defender for IoT”. Please also note that the “IoT Hub Device Provisioning Service”, which is explained in step 3, is only available in the S1 tariff.
All other options can either be retained or individually adapted for you.
2.1.4 Tags
Specify tags as desired.
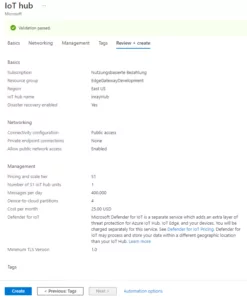
2.1.5 Check and create
Once you have set all points, click on “Check + create”. An overview of the corresponding options is given here.
If all settings are correct, the IoT Hub can be created. The deployment may take a moment.
To return to the overview page after creation, click on “Switch resource”.
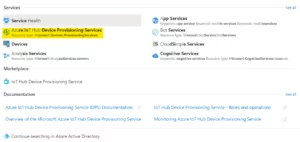
3. Device Provisioning Service
3.1 Creating the service
After creating the IoT Hub, you can create the service. To do this, enter “Device Provisioning Service” in the search bar.
To create a service, either click on “Create Device Provisioning Service” or on “Create”.

3.1.1 Basic settings
Again, select the appropriate subscription. Then the resource group can be set. Since one was created when the hub was created, you can select the same here. Then you can assign a name for the service. Only “Europe, West” can be selected as the region.
3.1.2 Network
As with the hub, select “Public network”.
For “Private network”, further adjustments may be necessary.
3.1.3 Management
Under “Management” you can view the costs per 1000 operations. Here you will also find a note that the “IoT Hub Device Provisioning Service” is only available in the S1 tariff.
3.1.4 Tags
Specify tags as desired.
3.1.5 Overview and create
After setting up the service, the overview is displayed. Click on “Create” to complete the process.

3.2 Link IoT Hub
After completing the setup, click on “Switch resource” to get to the overview page of the “Device Provisioning Service”. To link the service to the IoT Hub, click on “Linked IoT Hubs” in “Settings” on the left. We recommend copying the ID area, as this will be needed again at a later date.
Click on “Add” to select the IoT Hub in the window. In addition, an access policy must be determined, a default selection is owner.
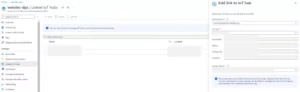
If you do not see the link, click on “Refresh”.
3.2 Registration
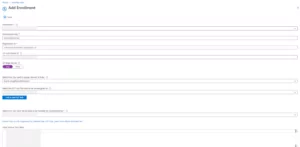
To register the unit, select “Manage registrations” in the menu bar on the left. Then click on “Add individual registration” in the window.
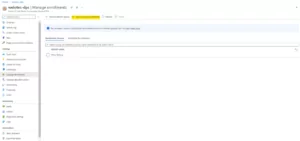
Two parameters are required from the Edge Device, the “Endorsement Key” and the “RegistrationID”. To obtain these, dial up to the device via SSH. After logging in, enter the following command: device tpm_get
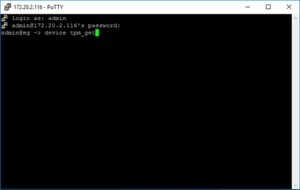
This will output the “Endorsement Key” and the “RegistrationID”. We recommend copying the RegistrationID, as this will be needed again at a later date.
Then enter the data in the registration in the Azure Portal. Make sure that TPM is selected for “Mechanism”. A name for the device must also be selected. This must not contain any spaces, otherwise errors will occur. In addition, the button for IoT Edge Device must be set to “True” and a corresponding IoT Hub must be selected (if several hubs are linked). You can set the remaining settings as you wish, or leave them at default. Once all the data has been entered correctly, the registration can be completed by clicking “Save”. The unit is then displayed in the list. Update it if necessary.
- Mechanism: Select TPM.
- Endorsement Key: Enter the Endorsement Key here.
- Registration ID: Enter the registration ID.
- IoT Edge Device: Set it to True here.
4. finalise the set-up
4.1 Operating system
After registration, check the version of the operating system. If the IoT Edge device does not have the latest version, we recommend an update. Contact our support to obtain the latest version.
If an update has been installed, we recommend rebooting the unit. The following command is used for this: reboot
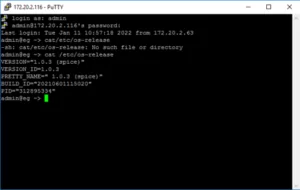
Note: The firmware version shown is not the latest version. The latest version is 1.1.0 (as of 06/2022).
4.2 Hostname (optional)
After checking the operating system, you can adjust the host name of the IoT Edge device. To do this, enter the following command: device hostname <name>.
This should not contain any capital letters or special characters.

Note: The firmware version shown is not the latest version. The latest version is 1.1.0 (as of 06/2022).
4.3 Linking IoT Edge Devices with Azure
To associate the device with Azure, enter the following command:
device azure_set_tpm <Scope ID of DPS> <Registration ID>.
Then paste the copied ID range from step 3.2 and the copied Registration ID from the device that was issued during registration. If the entry was successful, an “OK” is output.

Note: The firmware version shown is not the latest version. The latest version is 1.1.0 (as of 06/2022).
4.4 Test
Finally, check whether the setup and linking were successful.
To do this, use the command “iotedge check”.
For the first initialisation, you must start the Edge Agent and Edge Hub modules on your device in order to be able to use further modules. To do this, go to the assigned IoT Hub and then to the overview of your IoT Edge device.
For this first initialisation of the Edge Agent and the Edge Hub module, you must confirm the start of the containers with “check + create” under “Set modules”.
If this is successful, both modules will be displayed after a short time in your IoT Hub with the message “running”.
![]()
If errors occur during the test, please contact our support.
5. OPC router
The installation of the OPC Router can be found here on the website of our cooperation partner inray.